Making a quanket
August 2015
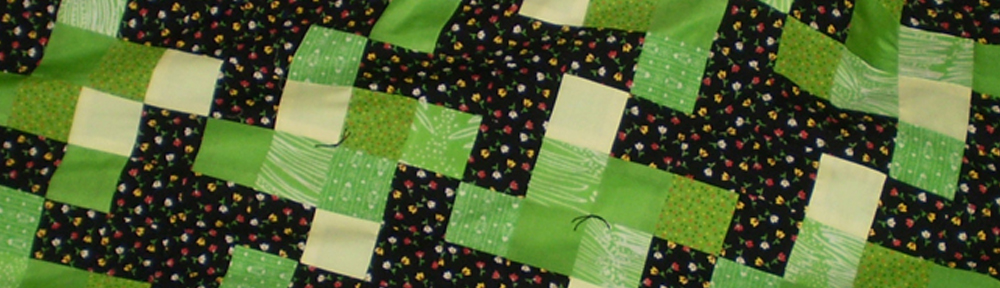
I have finally completed piecing and joining all my blocks. Now it is time to move on to finishing.
- I chose to do a 5/8″ edge binding because I did not want to distract too much from the overall design of the quilt. In the picture here, I have already sewn the edge binding to the top, and am ironing the seam that will be turned to the back. I pin the binding about every six inches, just to temporarily hold my turned seam in place.

- Once I have the binding ironed and pinned, I then use the floor in the guest room to lay out the quilt, and block it – somewhat similar to blocking a sweater. I lay it right side down, and working from the center out, start to square-up the blocks and rows, all the way to the outer edges. I find that working on the carpet provides a bit of tension, and helps to hold the quilt nicely as I make the minor adjustments to bring everything into square.

- For the fleece backing, I begin by cutting 1″ off one of the salvage edges, and then squaring the edge that is to one side or the other, like this: |_
- With the right side of the fleece facing up, I lay the fleece on top of the quilt, aligning the two squared edges to two edges of the quilt, again like this: |_
- I then pin these first two edges, pinning the fleece to the top about every 2-3 inches. *Sharp pins are essential! I pin from the quilt (top) side, as I will ultimately stitch in the ditch to finish the binding. Here is a great tutorial for this technique > stitch in ditch binding <
- Once I have the first two squared fleece edges pinned to the top, I then move to my third side. In the picture shown below, I am in the process of trimming the fleece to meet the edge of the top’s third side. While I could measure my top and cut my fleece beforehand, I find that since fleece has a fair amount of stretch to it, I get better results if I cut the final two sides of the fleece at this stage. I find that having it laid out flat on the floor lets the fabric lay more naturally, and not be accidentally stretched, as it tends to do if I do this on my cutting table – which is not big enough for the piece to be opened to its full size. I then pin the third edge, and then move on to trimming and pinning the fourth edge of the fleece.

- Once all four edges are pinned to the top, I then turn the quilt over, and block it again so that it is laying nice and square on the floor. I will ultimately tie the quilt top to the fleece backing after sewing the binding, so to prepare for this, I pin the top to the back while I have it laid out flat, as shown in the picture below. I like to place ties no more than 12″ apart, and I place the ties to compliment the overall quilt design. For this star surround pattern, I will tie in the center of the light pink stars, and in the center of the hourglass blocks, giving me a total of 13 ties.


Pingback: Flower Power | Love Hugs
This is such a beautiful quilt!
Thank you!